For many developers, the Gutenberg editor represents change. And for all, change is hard! So, when the new Gutenberg editor shipped natively with WordPress 5.0, I was filled with fear and trepidation and the possibility of change. When I first dived into the Gutenberg editor, I found it clumsy and difficult to manage. It was so disorienting that I quickly downloaded the "Classic Editor" plugin, which by the way, 4+ million other WordPress users did as well. But, the more I read about Gutenberg, I learned about its ability to blend flexibility with customizability. This was the perfect combination for a developer like myself, who worked primarily in creating hyper custom themes for small/medium sized clients. After some reading, specifically from Bill Ericson's blog, I decided to jump right into my first Gutenberg block development.
For this tutorial, I decided to create a custom hero section block (the large image or video that appears at the top of many web pages overlayed with text). Gutenberg already has a "Cover" block built into the editor, which can achieve this functionality, but if you want to actually be able to customize the Hero section to your specifications, you'll want to create a custom block. I'm using the Advanced Custom Fields Pro plugin to help build the custom block (ps- you'll need version 5.8 or higher). You can download it here.
STEP 1: Register your New Custom Hero Block
Before building the actual block itself, you'll have to register your new custom block in your functions.php file. Here's a code snippet of how I registered my custom hero block. I'll walk through some of the components:
function chrislamdesign_register_blocks() {
	if( ! function_exists('acf_register_block') )
		return;
	acf_register_block( array(
		'name'			=> 'hero',
		'title'			=> __( 'Hero', 'heroblock' ),
		'render_template'	=> 'partials/gutenberg-hero.php',
		'category'		=> 'custom-blocks',
		'icon'			=> '<svg xmlns="http://www.w3.org/2000/svg" xmlns:xlink="http://www.w3.org/1999/xlink" aria-hidden="true" focusable="false" width="1em" height="1em" style="-ms-transform: rotate(360deg); -webkit-transform: rotate(360deg); transform: rotate(360deg);" preserveAspectRatio="xMidYMid meet" viewBox="0 0 20 20"><path d="M2.2 1h15.5c.7 0 1.3.6 1.3 1.2v11.5c0 .7-.6 1.2-1.2 1.2H2.2c-.6.1-1.2-.5-1.2-1.1V2.2C1 1.6 1.6 1 2.2 1zM17 13V3H3v10h14zm-4-4s0-5 3-5v7c0 .6-.4 1-1 1H5c-.6 0-1-.4-1-1V7c2 0 3 4 3 4s1-4 3-4 3 2 3 2z" fill="#626262"/><path d="M4 17h12v2H4z" fill="#626262"/></svg>',
		'mode'			=> 'edit',
		'keywords'		=> array( 'hero section', 'header' )
	));
}
add_action('acf/init', 'chrislamdesign_register_blocks' );
In the code above, you'll notice a few parameters.
- Name - This value gets registered in the as an ACF database field.
- Title - This value corresponds to the tittle that displays in the Gutenberg Editor
- Category - This value assigns the location of the block in the Gutenberg editor. You'll notice a custom-blocks value in this parameter in my code above. I'll show you in the next step how to register a custom block category.
- Icon - This code displays the icon in the Gutenberg editor. I've used an SVG that I found from this dashicon library.
- Mode - This value assigns the default view. You can either choose "edit" or "preview". Edit mode is more of a classic editor feel with form fields displaying in the editor. Preview mode renders what the block somewhat looks like on the front-end and allows you to edit the content in the right sidebar.
- Keywords - These values allow your block to be indexed and searched in the Gutenberg search bar. You can add up to 3 more keywords.
STEP 2: Register Custom Gutenberg Category
As mentioned above, you might not want to use a built-in Gutenberg category for your block. As I've started to build out custom themes for clients, I think creating an all new category is a much better solution so that the client can find all of their custom blocks in one place. To do this, we'll be in our functions.php file again. This time, we'll register the custom Gutenberg category. You can name the category anything you want, but in this example, I've called it "Custom Blocks".
function chrislamdesign_category( $categories, $post ) {
	return array_merge(
		$categories,
		array(
			array(
				'slug' => 'custom-blocks',
				'title' => __( 'Custom Blocks', 'custom-blocks' ),
			),
		)
	);
}
add_filter( 'block_categories', 'chrislamdesign_category', 10, 2);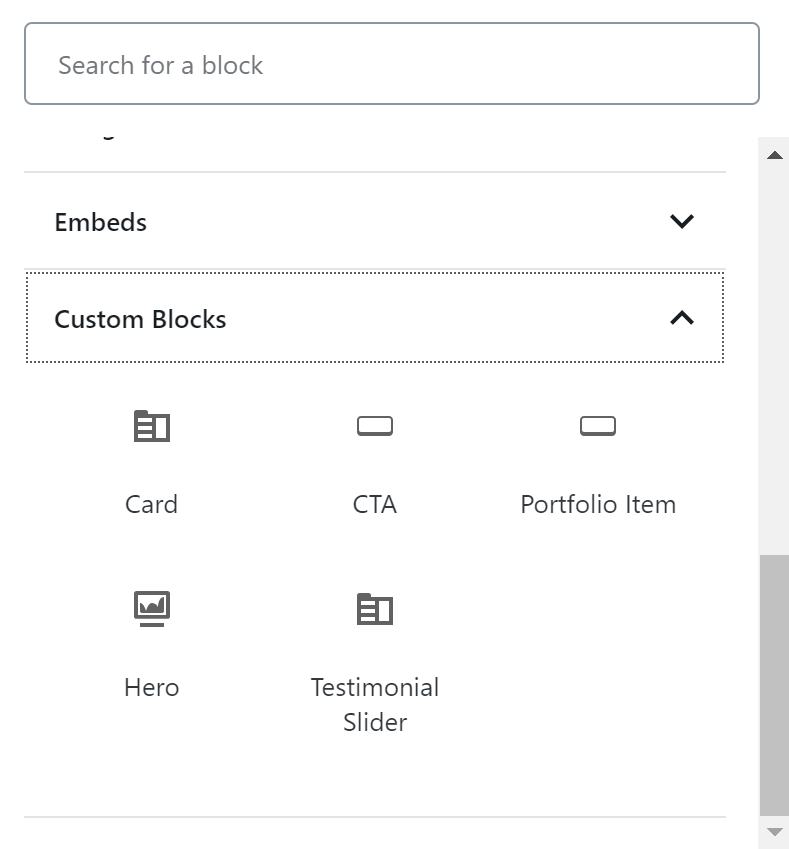
STEP 3: Create Custom Block Fields in Advanced Custom Fields
After you've registered your custom block and custom block category, it's time to finally build the block. Before we get into any php development, we have to create the ACF fields in our database. For this example, I created a very simple Hero Section that has a background image, heading, and tagline. I also created a field that allows the user to set the height of the hero section. So, in total, we need to create 4 fields in ACF.
Below, you'll see a screenshot of the fields I created in ACF. One important thing to note is that you have to set the location of the block to the custom block you've created.

STEP 4: Create the Gutenberg Block in a new PHP file
Finally, it's time to develop the actual block itself! To do this, you'll need to create a new PHP file and make sure you save in the location you specified all the way back in step 1 in your functions.php file. For this example, I created a folder called "Partials" and uploaded the php file in that folder. The code snippet below is the full PHP file.
<!-- Setting up our Variables for our hero component -->
<?php
$bg = get_field('hero_image');
$heading = get_field('hero_heading');
$tagline = get_field('hero_tagline');
$height = get_field('hero_height');
?>
<div class="hero d-flex flex-column justify-content-center" style="background-image:url('<?php echo $bg; ?>'); min-height: <?php echo $height; ?>px;">
<div class="hero-text">
<h1><?php echo $heading; ?></h1>
<p><?php echo $tagline; ?></p>
</div><!--hero-text-->
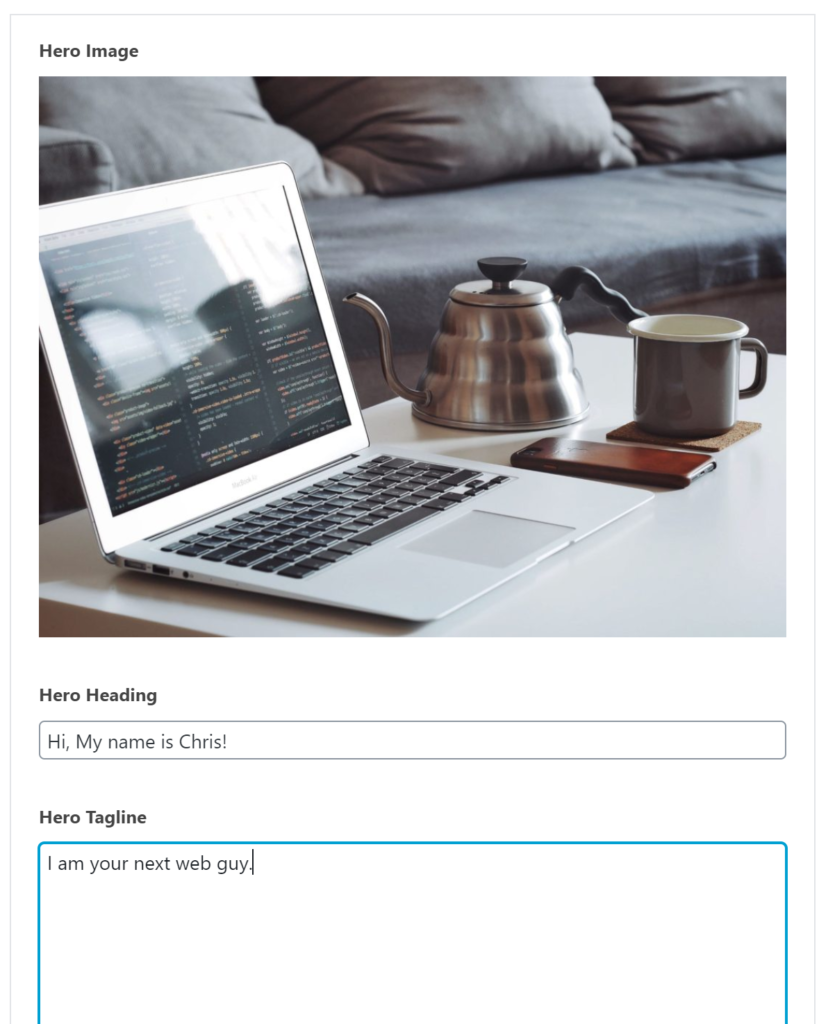
</div><!--hero -->STEP 5: Add Content to your block and enjoy!
Now that we've set up all of the components to create the custom block, you can add the block to any page on your site and add the content. Winning!
I also almost forgot to mention that you'll need to style your component in the CSS as well.